Trackball Mini V3: User Guide
Table of Contents
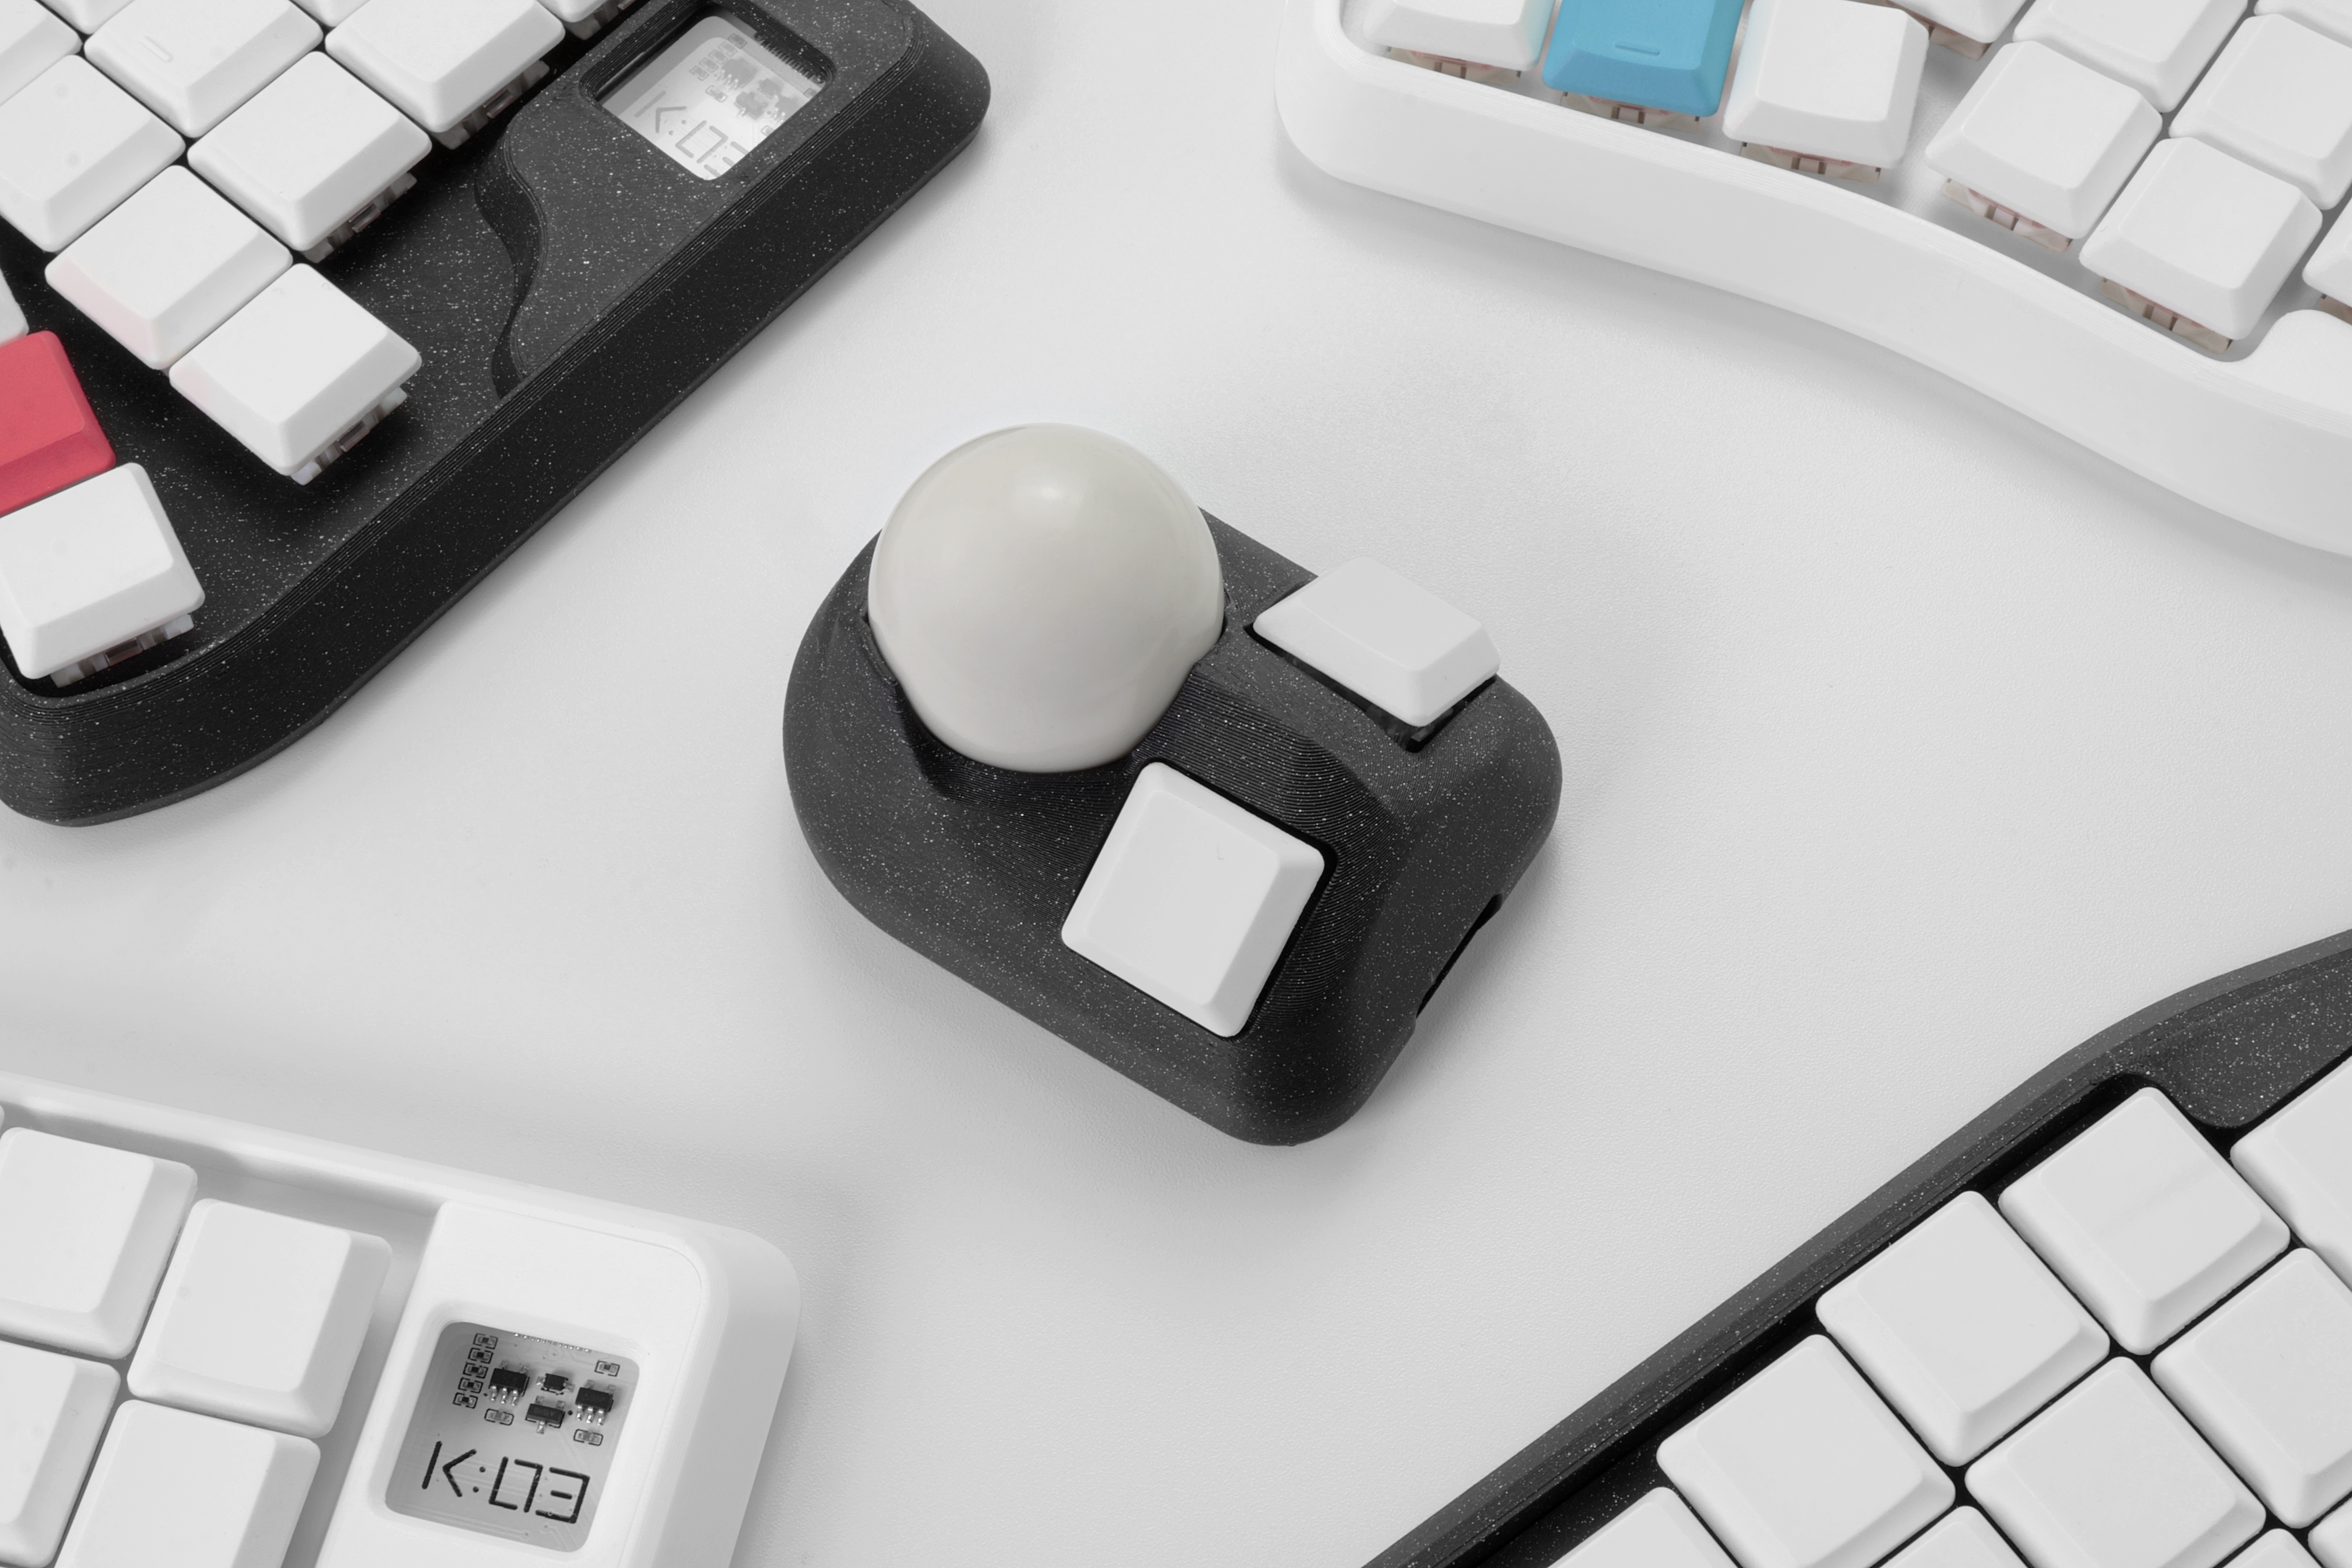
Trackball Mini V3 - an updated revision of the compact trackball, now connecting to any device wirelessly via Bluetooth and featuring 2 multi-functional keys. The keys allow you to perform basic mouse clicks and switch between trackball usage modes. This guide describes all the features of the trackball, its modes, and the setup process.
Connecting the Trackball
Step 1. Turn on Bluetooth on the device you are connecting the trackball to.
Step 2. Turn on the trackball by switching the power switch on the bottom cover of the trackball to the ON position.
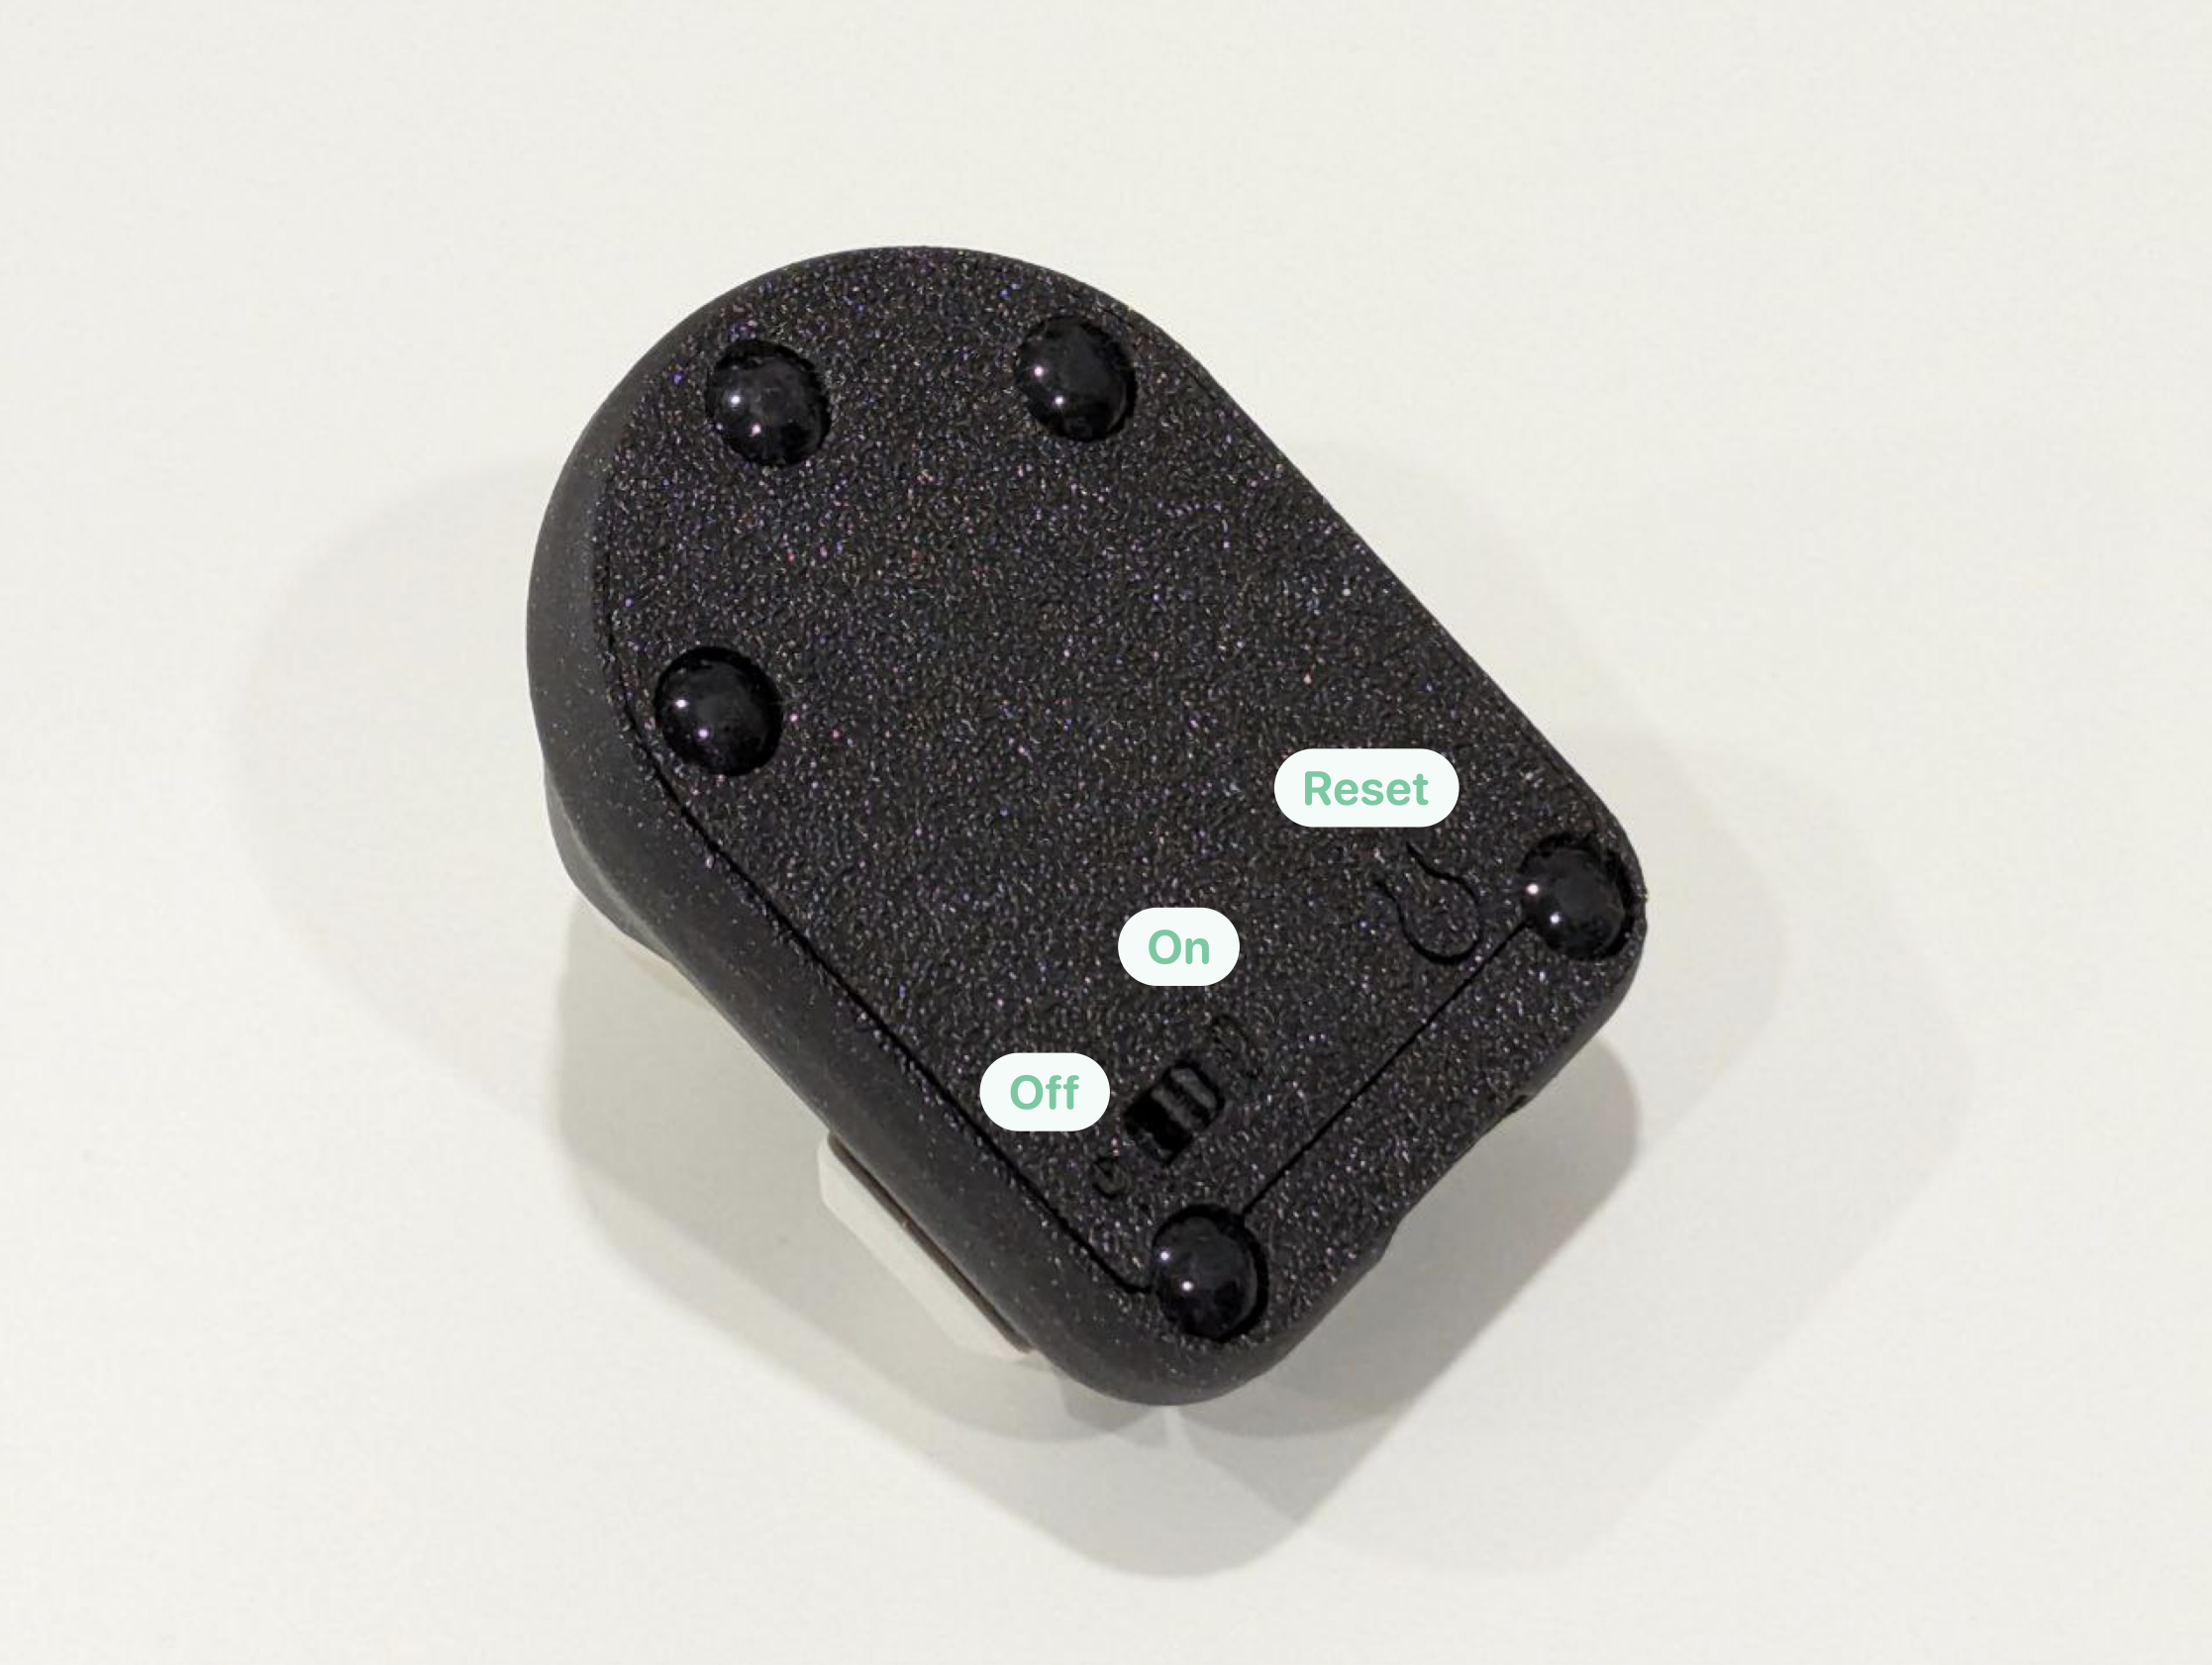
After this step, the trackball will enter pairing mode and appear in the list of available devices for connection. Connect to it. The trackball is ready to use!
Keys on the Base Layer of the Trackball
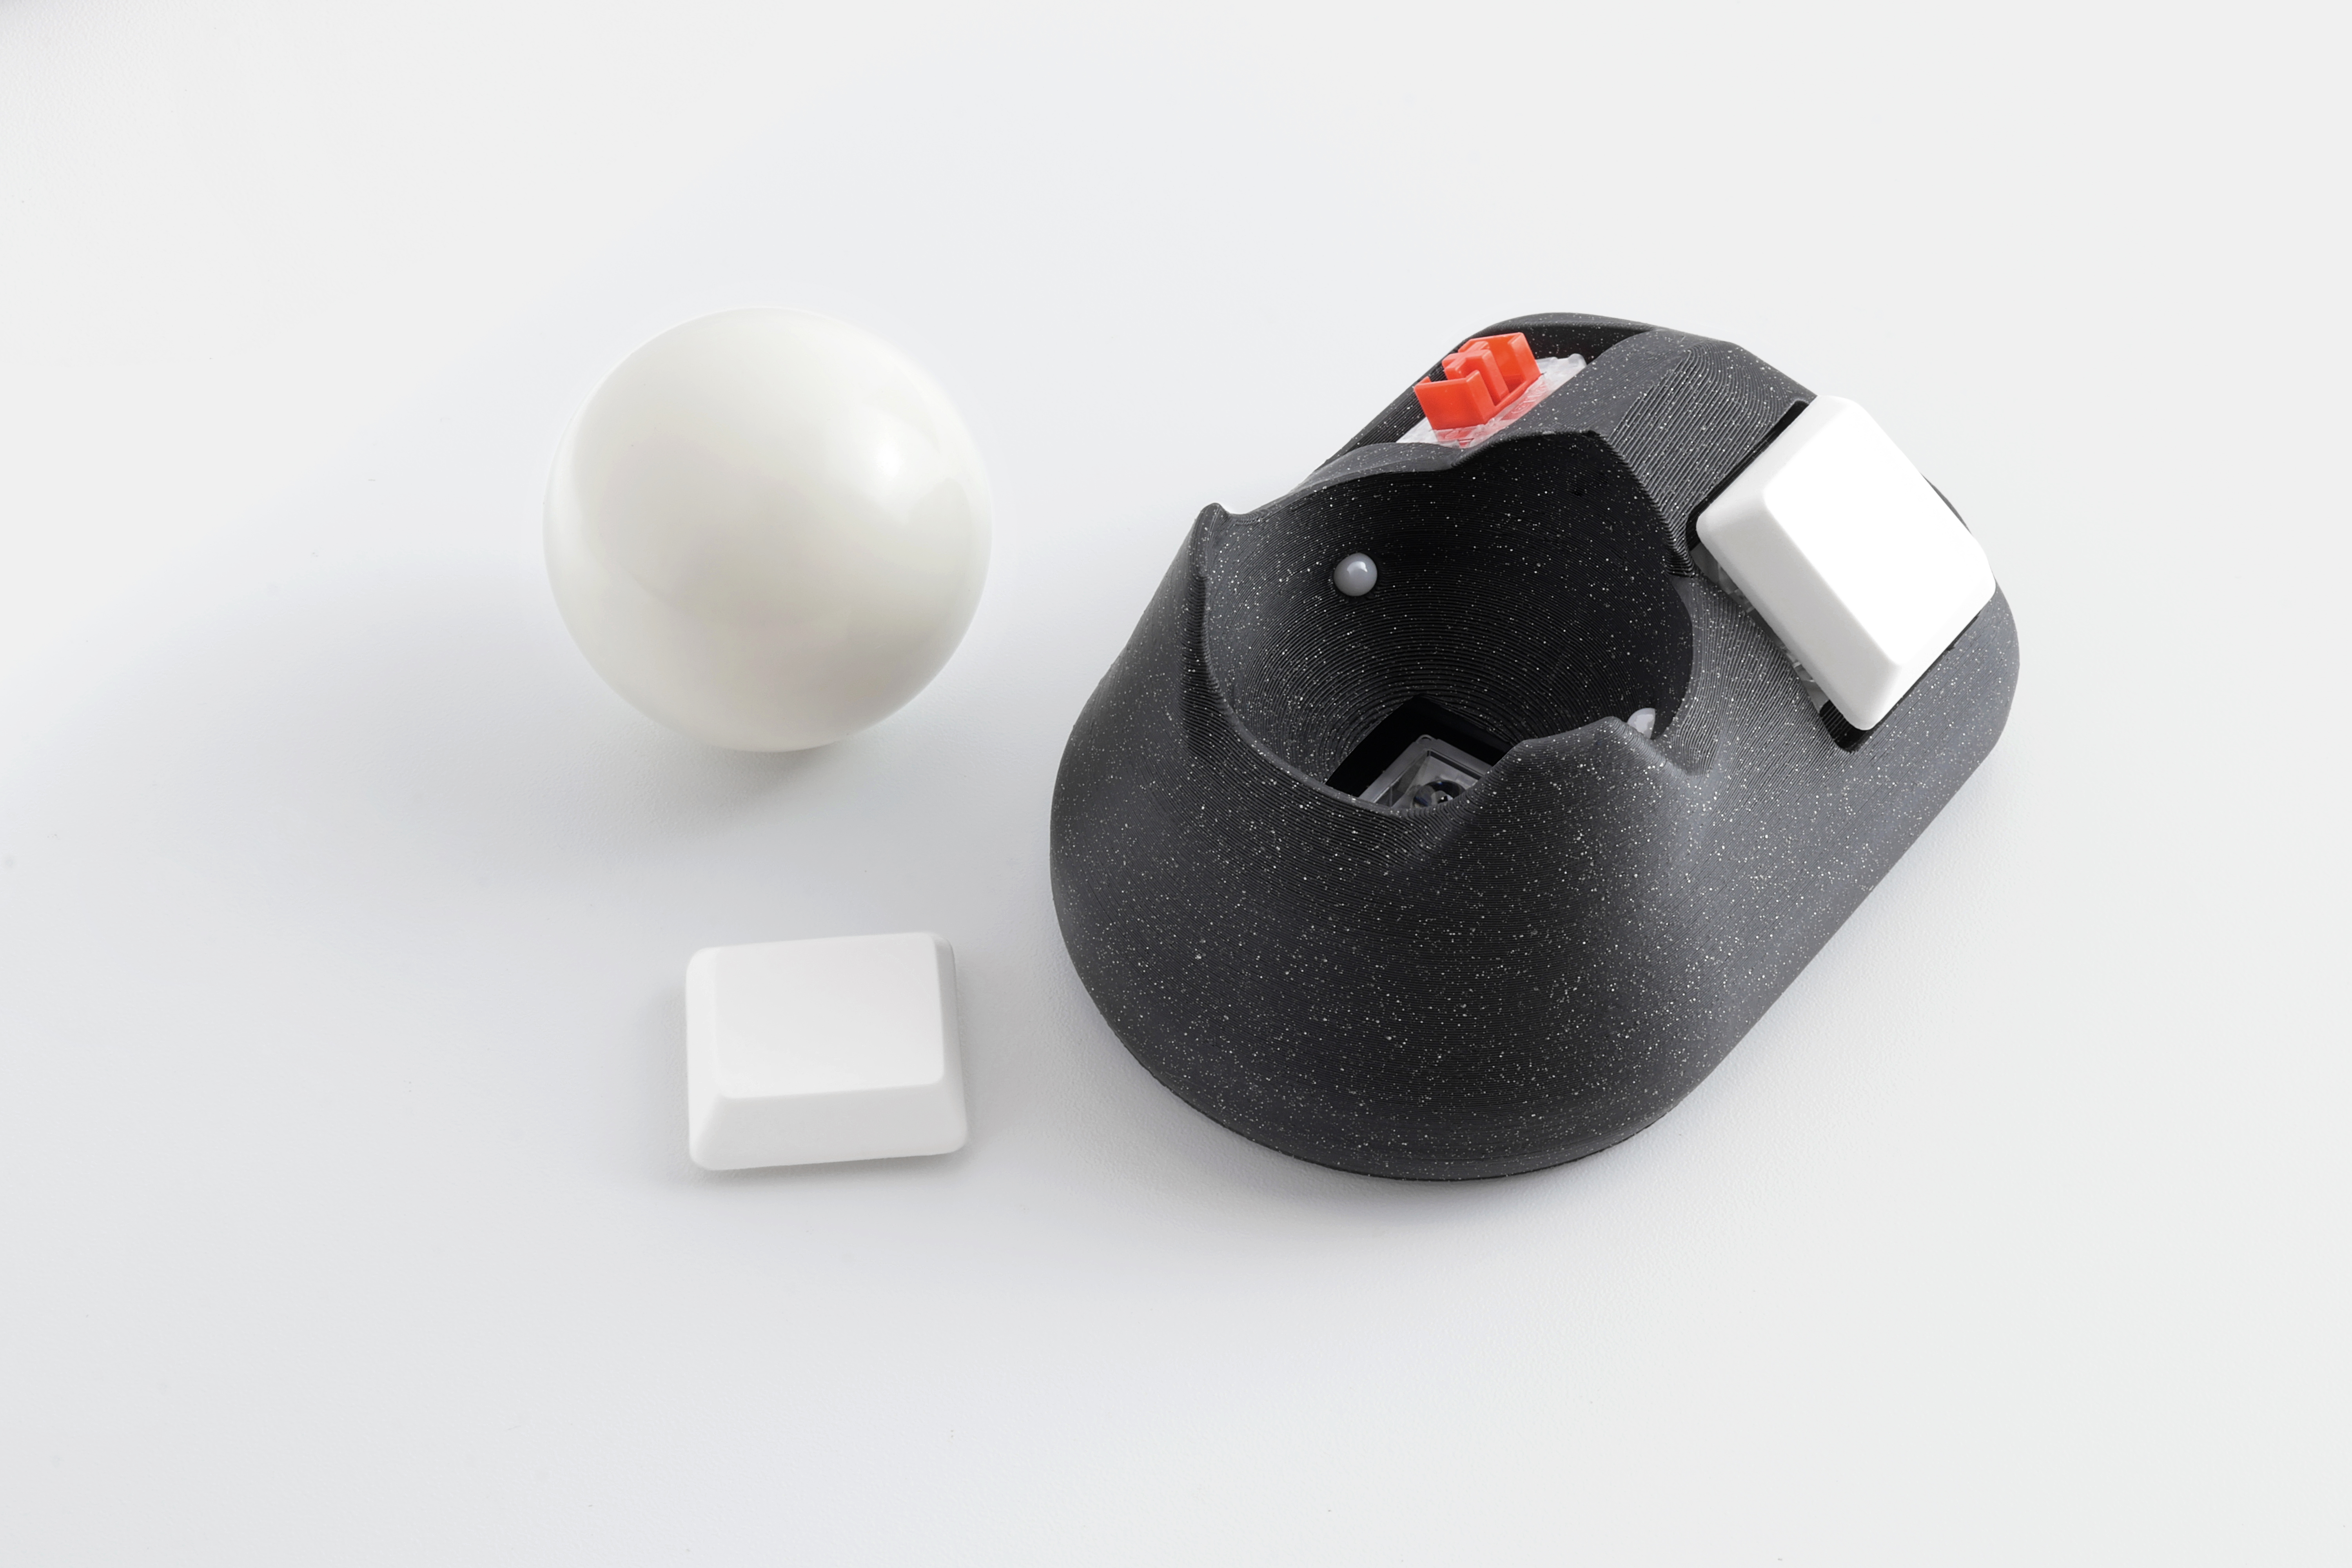
The two new keys on the trackball allow it to be used completely independently of programmable keyboards, as all actions performed with a mouse are available by pressing keys on the trackball, and the need for a separate mouse layer on the keyboard is completely eliminated.
Let’s take a closer look at what the keys can do.
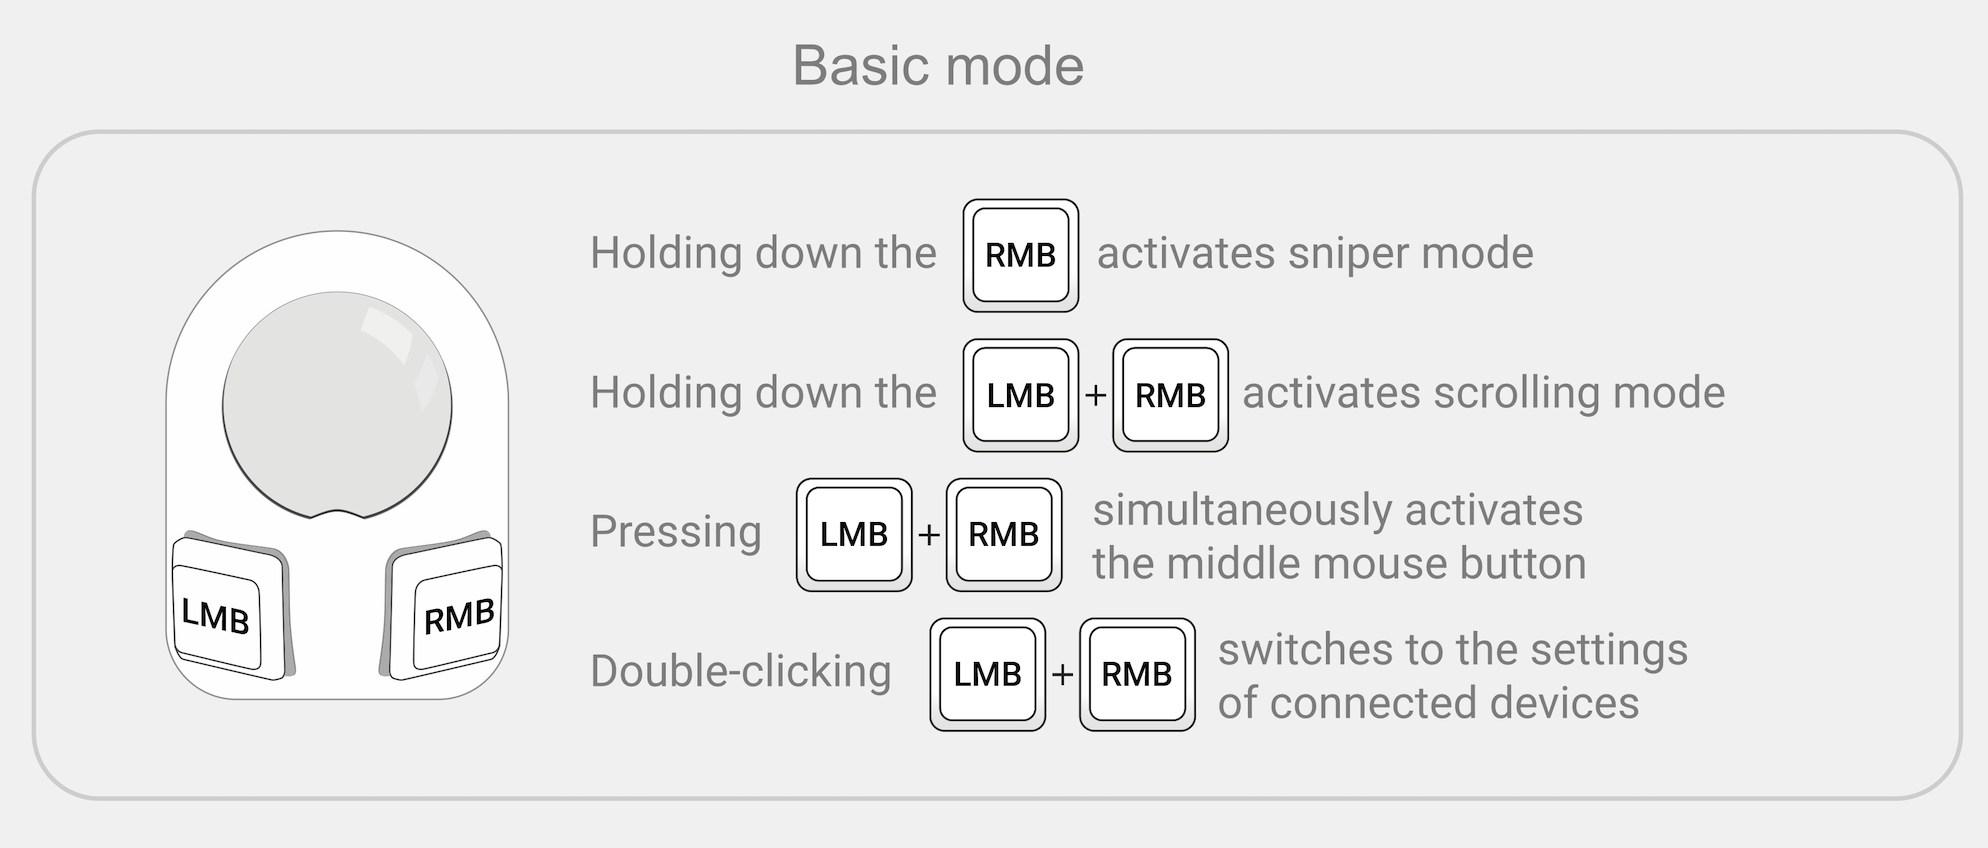
The left key of the trackball acts as the left mouse button (LMB);
The right key of the trackball, when tapped, will perform a right mouse button click (RMB), and when held down, activates “sniper” mode, in which the cursor movement speed is slowed down, allowing for more precise cursor aiming;
Tapping both keys simultaneously produces a middle mouse button click (MMB);
Holding down both keys puts the trackball into scroll mode, and rotating the trackball will scroll. Scrolling occurs both vertically and horizontally, depending on the direction of rotation of the trackball.
Settings Layer
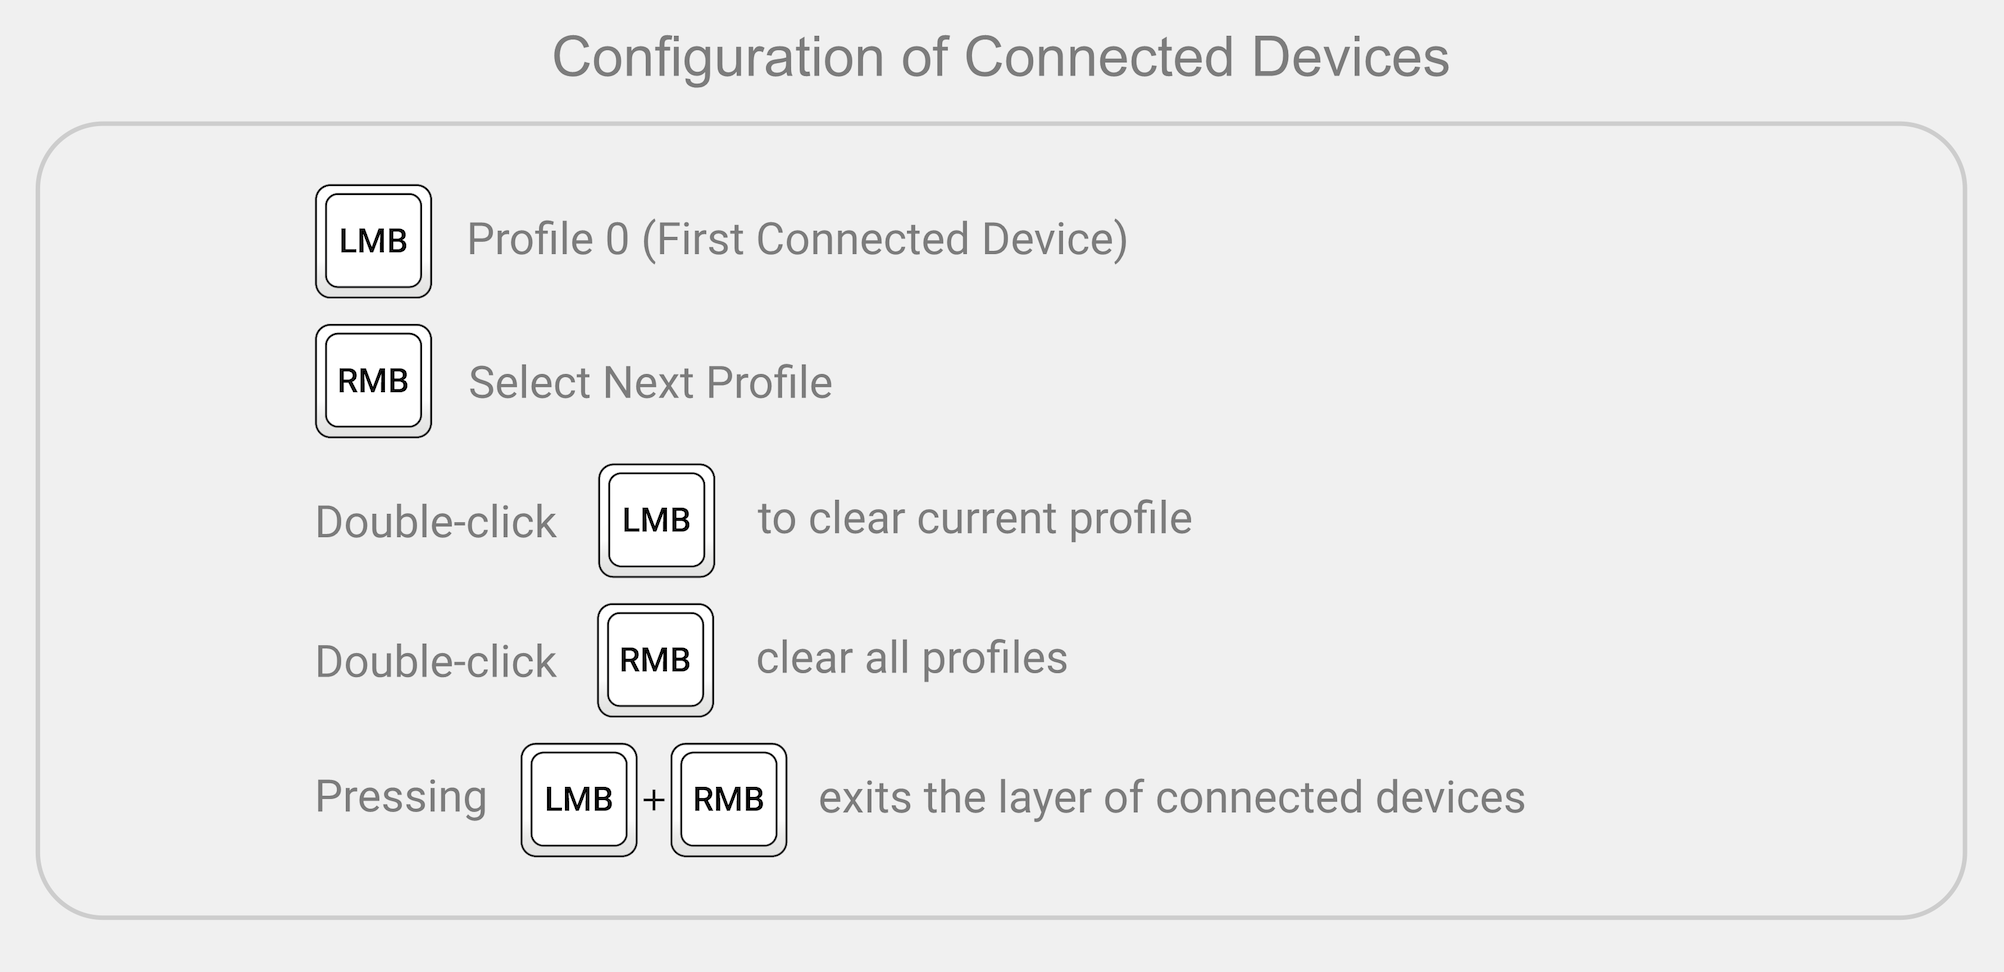
The trackball mini v3, like other ZMK devices, can be paired with up to 6 devices, and after pairing, the trackball can be switched between them by pressing a couple of keys. To connect the trackball to additional devices, you will need to use the settings layer. To access this layer, press both trackball keys simultaneously twice in a row.
To indicate being on the settings layer, the cursor moves significantly slower on it.
A brief summary of the actions available while on the settings layer:
Tapping the left key will select connection profile 0 (the first connected device);
Tapping the right key will switch to the next connection profile (there are 6 profiles available, numbered 0 through 5);
Double-tapping the left button will clear the current profile, making it available for connection to a new device;
Double-tapping the right button will clear all profiles, making them available for connection to new devices;
Tapping the left and right buttons simultaneously will exit the settings layer.
For more details on connecting to multiple devices and the purpose of the listed functions, please refer to the user manual First Steps with a ZMK Keyboard.
Configuring Trackball Keys
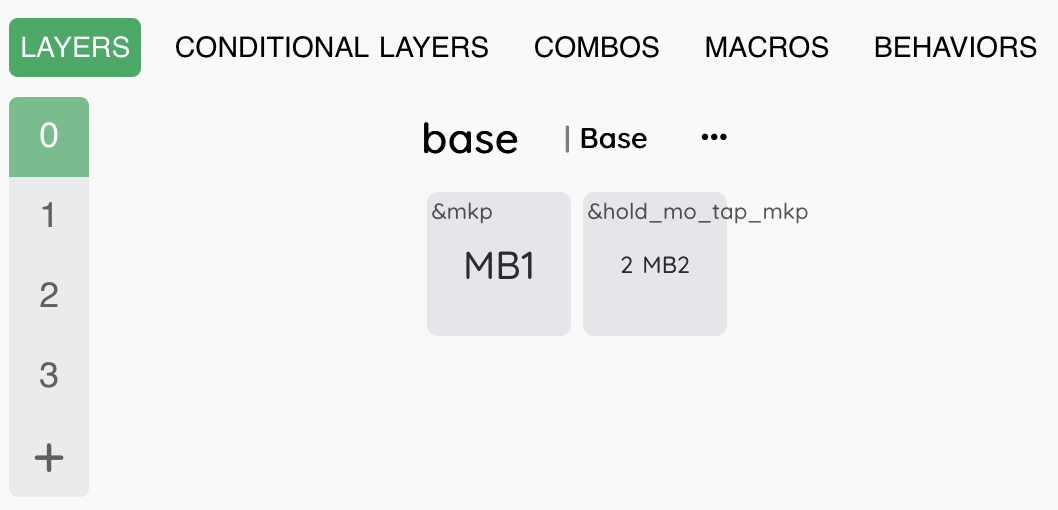
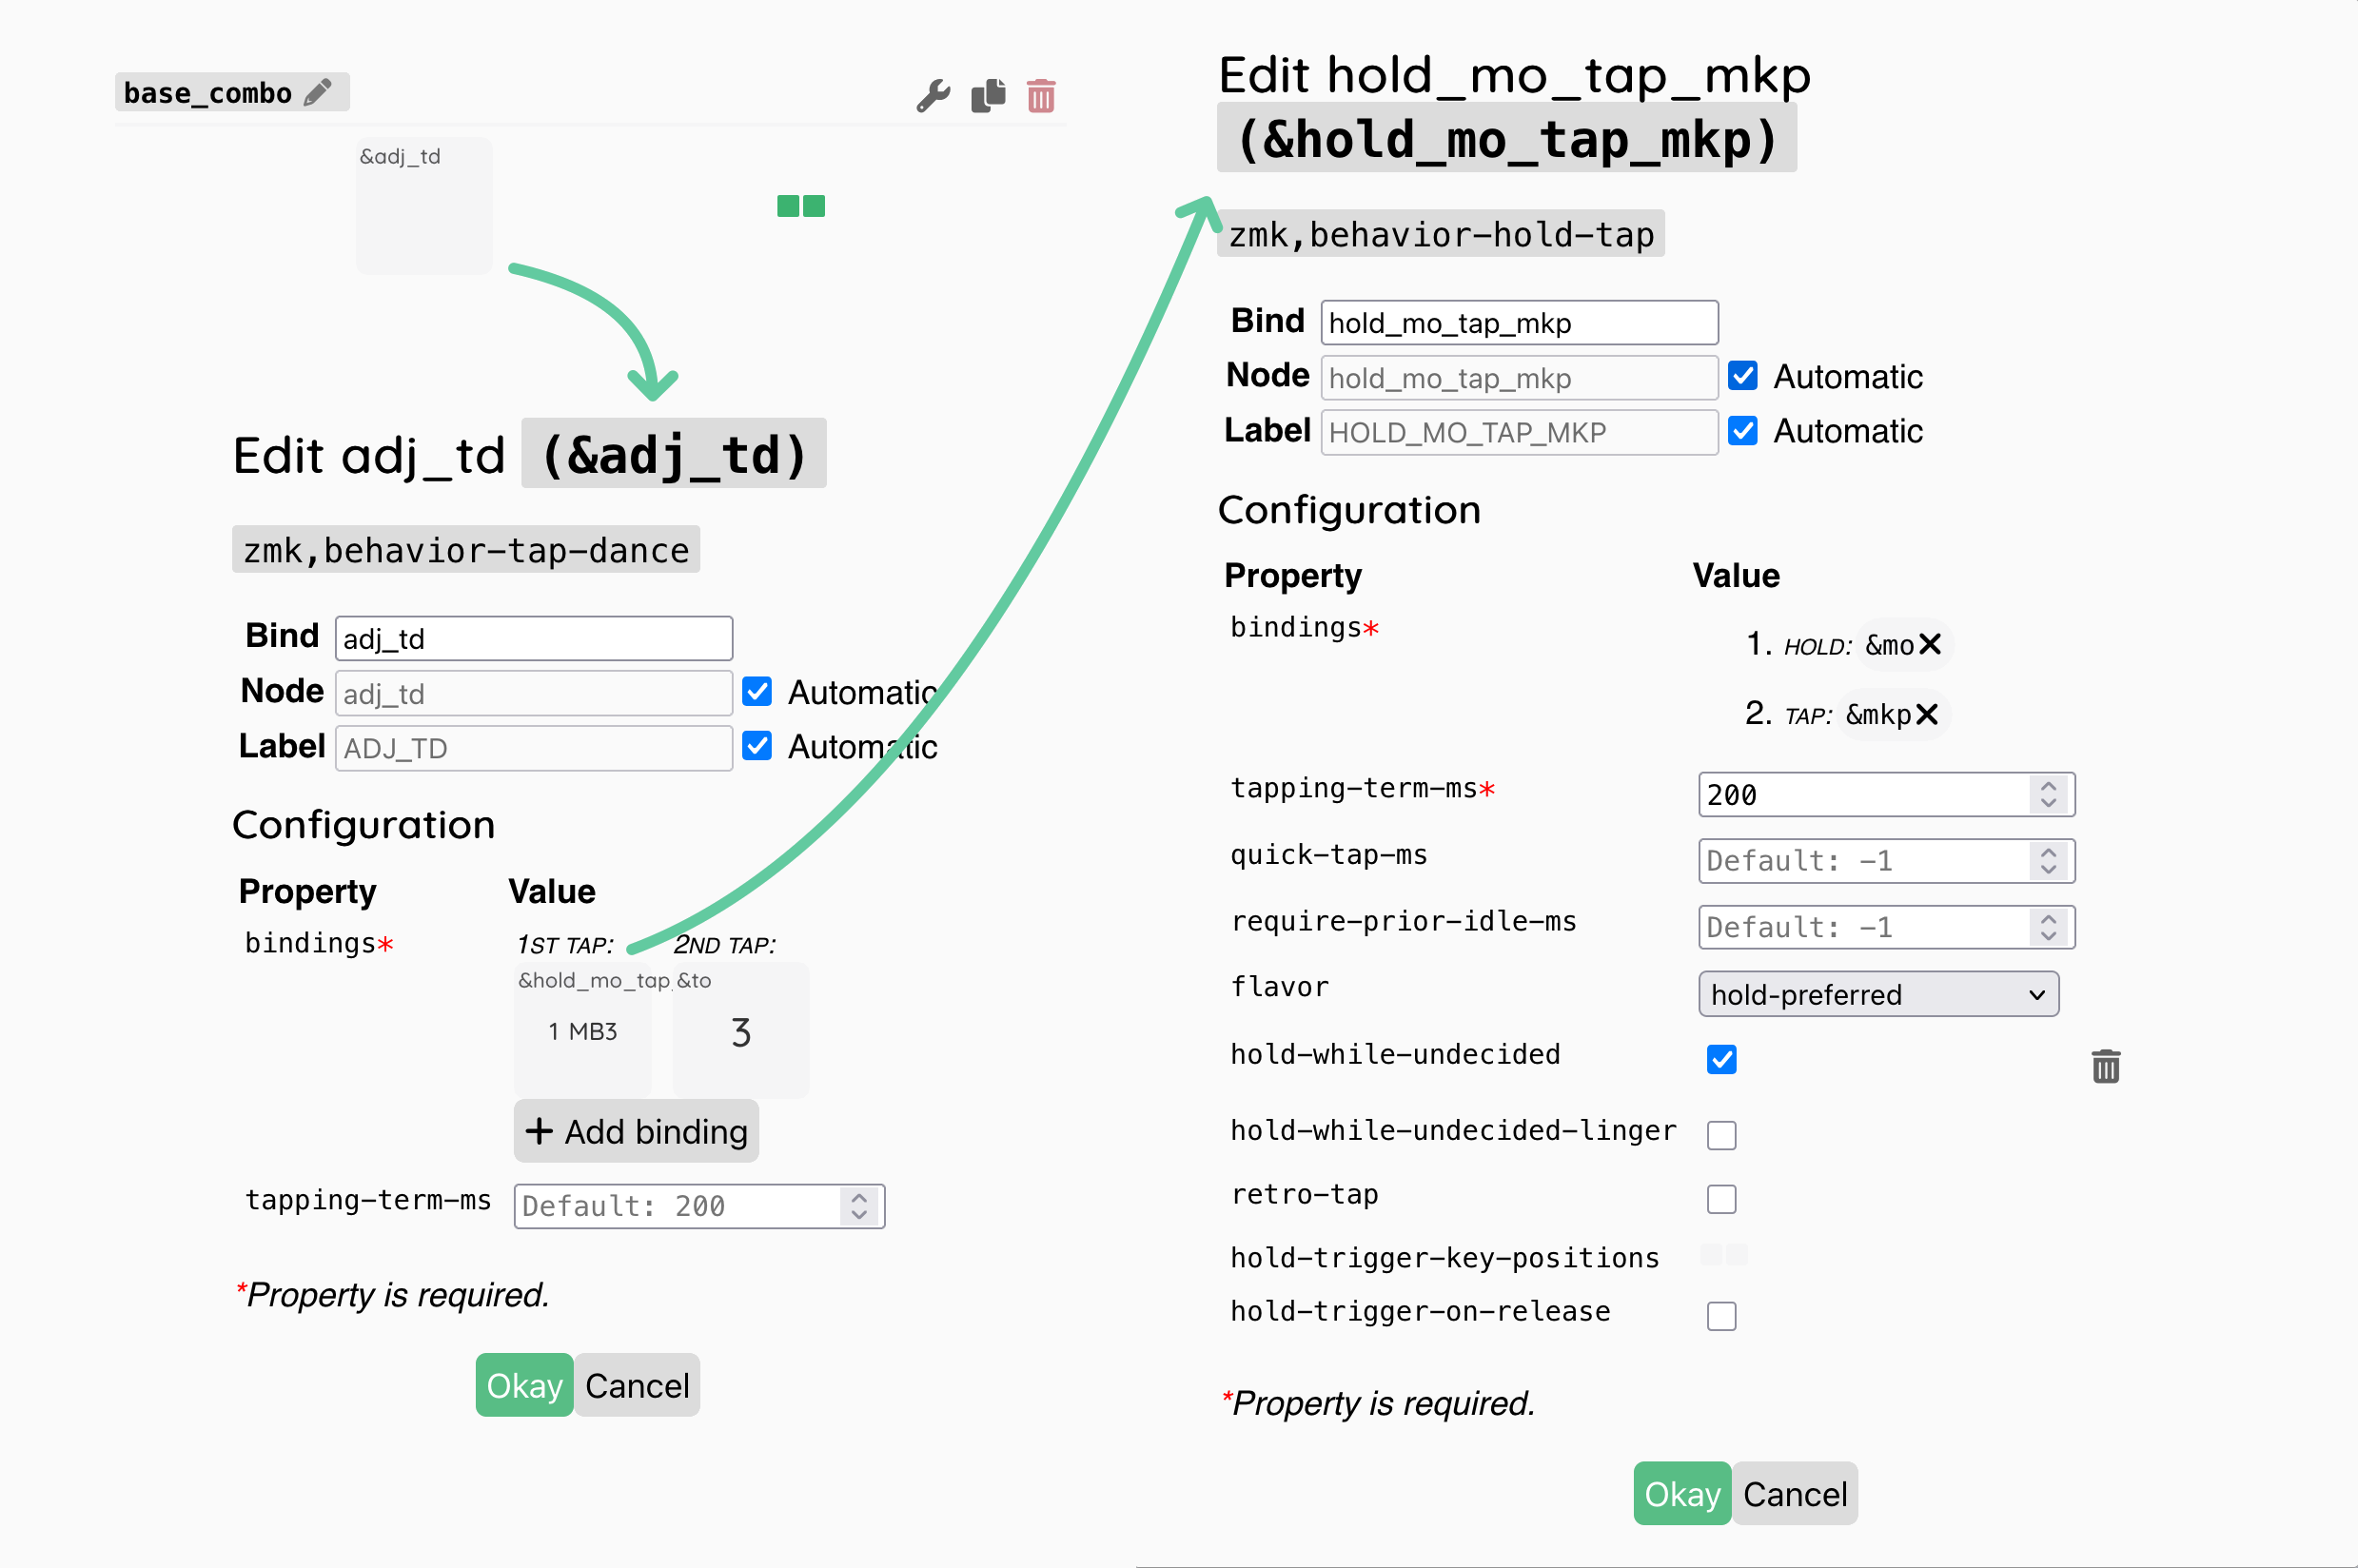
Any behavior can be assigned to the trackball keys using the keymap editor.
For example, if you rarely use Sniper Mode but frequently use Scroll Mode, you can swap their activation methods: activate Scroll Mode by holding the right mouse button, and Sniper Mode by holding down both buttons.
Or, if you often use applications where holding down MMB is used, you can remove the action when holding down the LMB + RMB combo, assigning &mkp MB3 to it.
Firmware, Charge Monitoring
Firmware updating and charge monitoring are similar to wireless keyboards on ZMK.
Switching Modes
Scroll and sniper modes are activated on the layers specified in the configuration, by default 1 and 2 respectively, and if you want to use these layers for some other purpose, you can move the activation of these modes to any other layer. How to change the layer numbers for the modes is described in Scroll Mode Settings and Sniper Mode Settings.
In the default layout, modes are switched using the &mo behavior, but modes can also be switched using any other behavior that activates layers. If you don’t want to hold the scroll mode button down, you can use the &tog 1 behavior to turn on the mode, then pressing it once will turn on layer 1 along with scroll mode, and pressing it again will deactivate layer 1 and scroll mode.
Configuring the Trackball
All trackball modes can be configured in the config/trackball.keymap file, which can be done quickly and easily in the GitHub web-interface by clicking the Edit this file button.
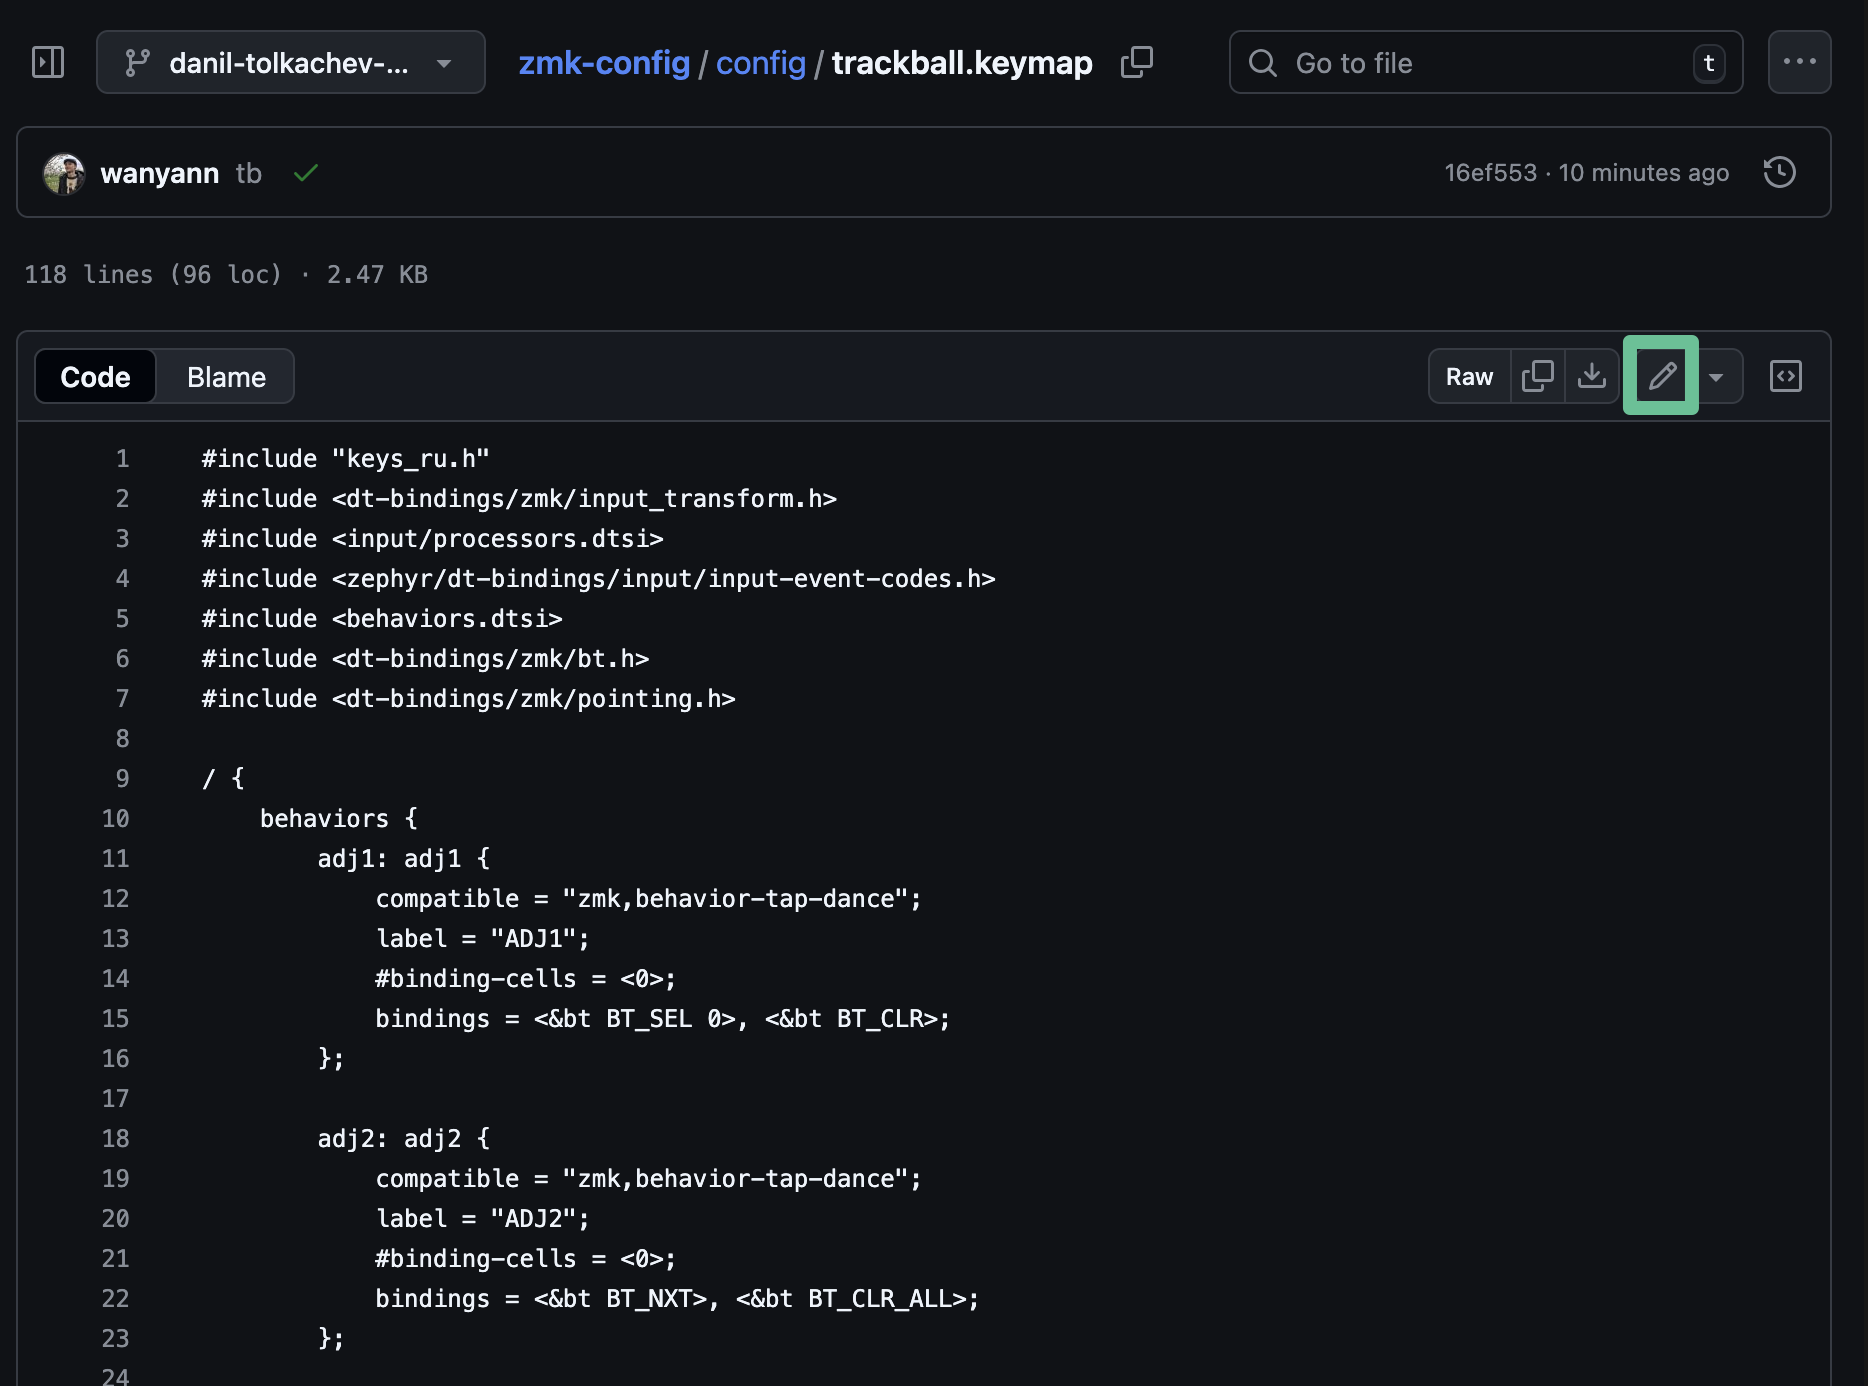
Open the file in your fork and scroll to the bottom, looking for the lines:
&trackball { cpi = <1000>; };

&trackball_listener {
    input-processors = <&zip_xy_scaler 9 20>;

    scroller {
        layers = <1>;
        input-processors =
            <&zip_xy_transform INPUT_TRANSFORM_Y_INVERT>,
            <&zip_xy_scaler 1 32>,
            <&zip_xy_to_scroll_mapper>;
    };

    sniper {
        layers = <2>;
        input-processors = <&zip_xy_scaler 1 4>;
    };

    adjust {
        layers = <3>;
        input-processors = <&zip_xy_scaler 1 8>;
    };
};
Let’s look at all available settings.
Cursor Sensitivity in Normal Mode
You can change the cursor sensitivity in normal mode in the line &trackball { cpi = <1000>; };, the cpi value is specified in steps of 200, and must not be greater than 3200.
In addition to the cpi parameter, the multiplier <&zip_xy_scaler 9 20> is also applied, meaning that the final sensitivity will be nine-twentieths of the initial cpi value. This value can also be changed.
&trackball_listener {
    input-processors = <&zip_xy_scaler 9 20>;
You can read more about the available input-processors in the ZMK documentation: https://zmk.dev/docs/keymaps/input-processors
Scroll Mode Settings
The following settings are available for scroll mode:
scroller {
    layers = <1>;
    input-processors =
        <&zip_xy_transform INPUT_TRANSFORM_Y_INVERT>,
        <&zip_xy_scaler 1 32>,
        <&zip_xy_to_scroll_mapper>;
};
layers = <1>; - the layers on which scroll mode will be active. After changing the layer number, you also need to change the behavior that switches to the layer with scroll mode.
<&zip_xy_transform INPUT_TRANSFORM_Y_INVERT> - inverting scrolling, you can invert both the Y axis and the X axis (<&zip_xy_transform INPUT_TRANSFORM_X_INVERT>), or even invert both axes by listing the parameters separated by commas: <&zip_xy_transform INPUT_TRANSFORM_Y_INVERT>, <&zip_xy_transform INPUT_TRANSFORM_X_INVERT>,.
<&zip_xy_scaler 1 32> - the scroll speed is specified as a ratio, by default the speed is one thirty-second. You can either slow down scrolling by changing the value, for example to <&zip_xy_scaler 1 64>, or speed up scrolling <&zip_xy_scaler 2 32>.
Sniper Mode Settings
The following settings are available for sniper mode:
sniper {
    layers = <2>;
    input-processors = <&zip_xy_scaler 1 4>;
};
layers = <2>; - the layers on which sniper mode will be active. After changing the layer number, you also need to change the behavior that switches to the layer with sniper mode.
<&zip_xy_scaler 1 4> - speed multiplier for sniper mode. By default, the trackball speed is reduced to one-quarter in sniper mode.
The cursor slowdown on the settings layer (
adjust) is configured in a similar way.
